
As soon as spring sets in and the temperatures begin to rise it is time to be thinking about your pool. Of course with a swimming pool in your compound, you should need little prompting because the hot temperatures will have you longing for your favorite cooling place. The duration of winter and the first few weeks of spring means you will have missed replicating your favorite beach and one of the best fun spots in your compound especially if you have a family.
The only challenge is knowing when to open the swimming pool for the season and even more importantly, how to do it so that it is safe and in the right condition the moment you want to take a dip.
This guide will take you through both aspects and give you a step by step guide of how to get your swimming pool ready for use in the spring and summer.
When is the right time to open your pool?
At least 3 to 5 weeks before you are ready to swim as the water temperatures begin to be warm up enough for bacteria survival and algae development. This will also make sure the pool water is ready for action as soon as the temperatures are right.

Most people tend to hold off on opening their pool until when the temperatures are soaring as they feel this is the time when it will be safe for swimming. It is the wrong decision since the determinant for when to open the swimming pool is not if the water is warm enough to swim in comfortably.
Several factors should determine when you open the pool and why it is better to open it earlier before the temperatures get comfortable enough for swimming. The main factors are algae, pollen and the expense of delaying.
While you are waiting to open your pool, algae can multiply.
Algae is one of the biggest worries for swimming pool owners. Warm temperatures and sunlight exposure especially for swimming pools with mesh winter covers create excellent conditions for the algae to grow.
As soon as temperatures reach 60 degrees Fahrenheit, algae will start forming in your swimming pool. Should you delay until temperatures are consistently above this, you will be setting yourself up for longer and more demanding cleaning work. It will further lead to delays from when you eventually can open the swimming pool.
The general rule of thumb is to open your pool as soon as it needs to be sanitized and when the temperatures may lead to algae growth and not close your pool until when the current temperatures make it difficult for algae to survive. It will make your cleaning work simple and the swimming pool safe for use.
Opening and closing your swimming pool when water temperatures are around 60 degrees will
leed to crystal clear water the entire off-season with no chemicals.
Besides algae, the next challenge for all pools closed and not in use at the start of spring is pollen. Your swimming pool can quickly turn into yellow, and a germination place of some sorts if you keep it out of use for long. periods of time.
When your swimming pool pump is being run and in use, the water is circulating so when pollen gets in the water it is easily caught by the skimmer. The filters suction removes it from the pool preventing the yellowing of the pool. However, with stagnant water, it just sits there piling up and makes your whole cleaning experience difficult and a challenge.
Waiting won’t save you, it will cost you.
The expenses you incur when you open your swimming pool late are no longer cost-saving given the modern swimming pool systems. Many pumps are variable speeds and efficient on the electricity bills.
Before the true swimming season arrives, you will only need to run your pump part time to keep it sanitized. Usually only long enough for the water to make one complete cycle is sufficient.
On the other hand, should you delay opening and your pool gets infested with algae and pollen the costs involved means you will end up spending more in cleaning hence opening the swimming late is
Make your backyard an attraction.
Aesthetic purposes is another plus. It makes sense to open your pool early as it increases the appeal of the home. Considering that many people spend most of their time by their poolside, you may not need the pool for swimming to put it to use. An uncovered pool with beautiful water during a family barbecue will make the evening that much more enticing.
Have it ready just in case!
You could also be surprised how fast the temperatures in the pool can heat up early in April before the full heat of summer. This is another reason to open your pool up sooner than waiting later.
We have all had the coldest winters some years. Spring is no different and just may be one of the warmest this year. Having your pool ready for a dip during unseasonably warm temperatures will prepare you to swim earlier and get more enjoyment from your swimming pool should the temperatures spike up early.
Equipment needed
Having the required tools needed and knowing what you will need for the cleaning up and the opening process will make the process easier.
You can always hire a swimming pool maintenance service, but if you love the challenge and fun of preparing your pool for the season, you will have to get the right tools. While the simple tools like a garden hose may be already with you, there are several others you may need to obtain.
More importantly, you need to get the right protective gear. It is an aspect people keep underrating and yet leads to unfortunate and fatal results. Statistics show that thousands of swimming pool owners end up requiring urgent and extensive medical treatment because of poisoning from the chemicals associated with the cleaning and maintenance of the swimming pool.
Wearing protective gear from the arms and to the face and the legs significantly reduce the chances of such accidents happening. Here
•A pool cover pump
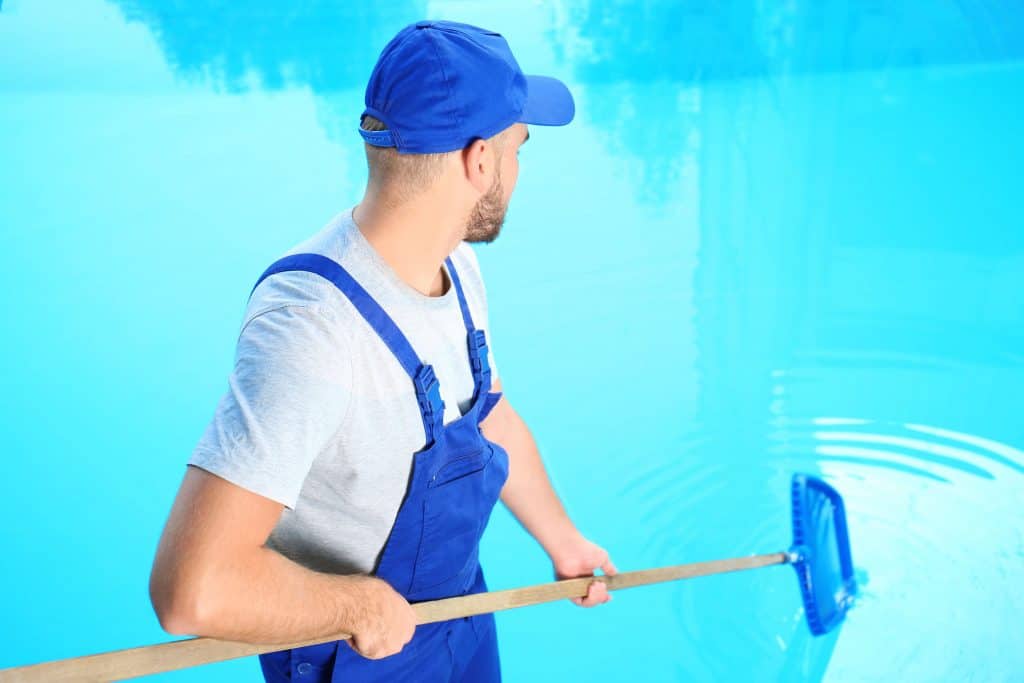
•A skimmer attached to a telescoping pole
•A garden hose
•Pool brush
•Chemical-resistant gloves
•A startup chemical kit
•A thread seal tape
•A swimming pool cover cleaner or you can use car wash soap instead
•Safety goggles
•Pool Shock
•Silicone-based gasket pool lubricant
•A skimmer net or any soft broom will do
•Chemical test strips
It will also be more convenient if you get a friend or two to help and they should also have their protective gear.
Chemicals needed

Usually, you will need several chemicals to shock the water in the pool as well as balance all the essential elements for a healthy and toxic free pool.
The compounds you will need are primarily determined by the tests you get from the water. A one-stop solution for everything is getting a full chemical start-up kit, or buy what you need only. In addition to that you may still need the following;
• Chlorine
• pH increaser and pH decreaser
• Alkalinity Increaser
• Calcium hardness increaser
• An algaecide
• A metal sequestrant
• A water clarifier
• pH increaser and pH decreaser
• Alkalinity Increaser
• Calcium hardness increaser
• An algaecide
• A metal sequestrant
• A water clarifier
Step 1
Clean the area around your pool; this is the one area many people tend to forget only to work on it later but then end up sending debris back to the cleaned pool. The worst case scenario is forgetting about the area. It will be not only an eyesore but also a source of waste to your pool.
Prune everything that needs pruning, clean all the mess caused by winter to the nearby plants. Making pruning a regular task year round will reduce the work required. The pool deck should be free of any plants or objects that can easily find themselves in water.
Step 2
Clean and drain the winter pool cover; having sorted the area around the pool from the patio to the pool deck, you can turn your focus to the winter pool cover. You will be lucky if you only have dry debris on the sheet since you just need to use the soft broom to clear it all up. The hard work is when there is wet dirt on the cover.
It will require the use of a pump or manual siphoning to drain the water away. It can be dense and a lot since it has accumulating debris for more than five months on the surface. You can use a cover pump or submersible pump to quickly remove the water.
The choice of pump you use is crucial since it will determine how you will do the draining and debris clearing. Some pumps can be pretty slow taking only wet dirt. Others can take up pretty much everything with ease
Knowing your pump’s capacity enables you to avoid overworking and potentially destroying the pump. Some of the water on the cover may get in the pool, but it should not worry you much as you will have enough time and resources to address that later on.
Step 3
Remove the winter pool cover; you are going to need the extra help from a friend or family member to make the removal more manageable and smooth. Start at the shallow end with each person grabbing a corner and then proceed to remove it depending on the type of pool cover you have.
For the solid covers, fan-fold into 3 to 5-foot folds. For the mesh covers, you will first have to unfasten it from the anchors using either an Allen wrench or an accompanying removal tool. Once you are done, proceed to fan-fold it in an accordion kind of style. Proceed to lay it flat on a hardscaped surface like a driveway and where the surface is slanted to allow natural drainage.
An above ground pool is much easier with a team of helpers. Have a couple of people slowly removing the liner on each side while rolling it up. Additional help may be needed to help prevent the center from getting water on it. The weight of the water on the cover will make it hard to remove and allow a lot more debris to enter the water.
Step 4
Clean the pool cover and store it well; as you clean the pool cover, it is a chance to inspect it and determine if the pool cover fared well during the winter. You get to decide if you should proceed to clean and store it or do away with it altogether and make plans to get a new pool cover by the time the next winter is around.
Spread out the pool cover, apply cover cleaner or use car wash soap if it is readily available. Then use a soft broom to wash and scrub off any dirt and stains gently. Do not use any cleaner not recommended by the manufacturer or abrasives to clean the pool cover.
Avoid the use of hard or sharp tools for the removal of spots.
This will prevent any scratches or tears from developing on the cover which results in damage or wearing of the cover reducing its lifespan.
Once you have cleaned it out, allow it to dry completely, or you can use a leaf blower or a towel to speed up the drying. Proceed then to roll it tightly or fan-fold it before fastening it with a rope or strapping. You can then place it in a storage bag or case and tightly fasten it for safe keeping. If you also used water weights, you should allow them to dry completely, before you store them.
Step 5
Skim the pool to remove the debris from the removal; while you will have a more thorough cleaning process later on you want to get out any objects that will have dropped from the cover into the pool. The larger objects a risk of clogging the filter system when you turn it on, and it is also a chance to lighten the burden of cleaning later on.
Step 6
Conduct inspection, removal, and replacement; as you closed the pool for winter, you had to make specific changes to proof the swimming pool and prepare it for the rough treatment of winter. Some of these changes include blowing out the pipes and getting winterized plugs fixed to prevent the water from getting back into them and freezing inside.
You will have to remove the plugs from the surface skimmers and on the wall returns. Once this is done, you have to get the directional fittings back. If you used water tubes, you would need to remove them here as well. If you applied an ice compensator or in other cases you improvised and used a soda bottle, you should remove it. You may notice bubbles in your pool caused by the resumed water flow in the pipes.
It is also the time to check around for the condition of the pool especially for cracks on the tiles and the floor of the pool. Check also for chips and indentations on the plaster and around the pool and fix the minor repairs needed before they grow into significant issues.
It is also a great time to deal with the scale caused by calcium and other stains on the pool floor, especially if you did a complete drain on your underground pool. You can make use of the standard household tile cleaner or even baking soda and a tile brush. Stubborn stains can be removed safely by a pumice stone.
Step 7
Reinstall equipment; all the equipment and fixtures used in and around the swimming pool needs refitting. From the safety rails or hand grabs, the jump boards and slides get them back in. It is much easier to clean them before you install and you can use the chrome cleaner for the metal parts.
It is also the time you get to fix
Step 8
Add water back in the pool; add water back into the pool to get it back to the required level. Even with a winter cover on, there are high chances that over the months you have lost water in the pool mainly through evaporation. It makes more sense to get the water levels back to normal now than later on after you have already gone through cleaning and other steps.
You do not want to have to do chemical balancing twice. So it is more useful to add water first and then deal with the chemicals and filtering of the pool later on. As you add water back to the pool be sure to use a hose filter as it will prevent contaminants and metal from getting into your pool.
Step 9
Get your filter and pump up and running; the first step before you set up everything is inspect both the filter and pump. You do not want them to malfunction after you have everything ready to run. The first step it to reattach the drain plugs in the pump and the filter as they should be using the thread sale tape mentioned above.
If there are several O-rings it is better to proof them against the sunlight and oxygen they will be exposed to in the spring and summer using the gasket lubricant for pools.
You should also lubricate the O-ring in the pump housing while checking to see if it has any cracks and thus needing replacement. If you do not replace it, then air will be sucked into the pump contributing to its malfunctioning later on. Those who have pool heaters and chlorinators should also fix back the drain plugs and do the necessary lubrication.
Once this is done, you can proceed with the rest of the pump and filter setup. Open the return side valves to provide a way for the water being pulled in the pump to follow.
For a multiport valve, set the handle to waste and proceed to replace the pressure gauge, sight glass, and the air bleeder. Turn on the circuit breaker and then turn on the pump. You will know the pump is primed once you see water flowing through. Then you can set your attention to the water filter.
Wash it, and inspect for any faulty parts or cracks, decide whether you need to replace it or it is working as intended. If you can work with it, then switch the multiport to the valve to filter.
These processes should help you get rid of any antifreeze you may have used as you closed the pool. In case some of it makes its way to the pool you should not mind since it is not toxic and better yet, you will get it out through the subsequent filtering and cleaning cycles.
You should keep an eye on the pressure gauge, should it start spiking up, stop it immediately and check for obstacles that could be blocking the flow of water in the pump. You can troubleshoot the pump one more time and prime it again for optimum performance.
Step 10
Neutralize the metal levels in the water; winter allowed the metal content in the pool to build up, and the buildup can easily lead to scaling and staining on your pool tiles and also causing discoloration.
The metals usually from fill water and even if you use a filter, small levels still pass through and when you consider the more than up to 20,000 gallons of water you have in your pool that is a lot of metal just sitting for months.
Other sources of metal in the pool include equipment used, corrosion, fertilizers, screen enclosures, and more. To prevent the stain and discoloration it is best to add a metal sequestrant to neutralize the metal content in the pool.
Once you have done this, you should let the water circulation and filtration to run for about 2 hours before proceeding with your other cleaning and preparation work.
Step 11
Brush and vacuum the pool; this is where you do most of the manual work because while a robot may do the job much faster, it will not be as thorough as a manual vacuum cleaner. You also risk it adding the collected algae back in the water.
Having removed the large debris, get the instruments you will need for the job including a telescopic pole that you will attach to the vacuum head, a long vacuum hose that can reach all the parts of your pool and a scrub brush. Start from the shallow end and use long strokes which overlap slightly so as not to leave any part.
Work your way slowly to avoid kicking debris up as it will hinder your effectiveness and affect visibility. Keep an eye on the filter pressure gauge, and if it goes past recommended levels or if you have kicked up a cloud in the water, you can take a break and give the filter some rest and the water to resettle. You may also need to clean your filter or backwash your pool.
Once you finish cleaning the pool, attach the brush to the pole and proceed to scrub the pool sides to remove any dirt or debris on the sides of the pool. Vacuuming and brushing the pool makes the shocking process you do later on much more effective.
Step 12
Test and balance the water; as part of restoring your pool to a condition you can safely swim in you need to adjust all the chemicals and ensure they are at the required levels.
However, ensure the filter has been running for 12 or more hours so that the new water you added has properly mixed up with the rest of the water for more accurate readings.
You can use the test strips you have for testing, but experts recommend that if you are opening the pool for summer, you get the water professionally tested in a swimming pool store. Most of the time it is usually free, and it allows you to examine comprehensively and more accurately. The main chemicals to test for are;
•The water’s pH level
•Alkalinity
•Calcium Hardness
•Chlorine content
The pH levels determine how much chlorine can turn to hypochlorous acid in the water. It should range from 7.2 to 7.4. You can use soda ash to increase it while sodium bisulfate and muriatic acid decrease it.
The alkalinity levels should be at 80 to 120. Alkalinity helps maintain pH consistency and can be increased by sodium bicarbonate or decreased by muriatic acid.
Calcium hardness is the measure of how much calcium water can absorb, and it is directly affected by the hardness or the softness of the water. Softer water absorbs more calcium than hard water.
Without calcium in the water, it will absorb it from the environment which risks having it taking from the grout in the tiles and destroying them in the process. It should be at 150 parts per million (ppm) to 250 parts per million.
Chlorine is the principal sanitizing agent in the pool and serves to kill bacteria and algae in the pool. It should read between 2.0 and 3.0 on the test kit.
Finally, there is a stabilizer known as Cyanuric Acid which forms a bond around the chlorine tablets and protects it from being acted on the sun making it last longer in the water. You need to maintain stabilizer levels especially when you add fresh water at 35 ppm.
All these elements are to be kept constant for a balanced environment in the pool. To start, adjust alkalinity first, then pH levels and finally calcium hardness.
Step 13
Shock the pool; Shocking the pool is one of the most important things you will do to get your swimming pool ready for the summer. It is also a regular swimming pool maintenance exercise. It is done to kill the spores from algae, bacteria completely and even get the water sparkling clean.
It is achieving super-chlorination levels and also helps in getting rid of chloramines which can irritate the eyes, skin and respiratory system. To understand how this works you need to know about free chlorine, combined chlorine, and total chlorine.
•Free chlorine (FC) refers to the chlorine active disinfecting your water. It is this whose levels have to range from 1-4 ppm
•Combined chlorine (CC) refers to chlorine that has been used. It is still in the water, but it no longer has its sanitizing power. Its levels should be at less than 0.2ppm
•Total chlorine (TC) is the whole amount of chlorine in the pool or simply FC + CC.
The testing kit you have can give you the readings of free chlorine and the total chlorine. To get combined chlorine, you have to subtract free chlorine from the total chlorine in the pool.
To achieve super-chlorination or to get to the breakpoint chlorination, you will need to add to the pool free chlorine that is ten times the amount of combined chlorine present. Such an amount is what will help the free chlorine to break the molecular bonds of chloramines.
It is, however, essential to know that you cannot use the usual chlorine tablets to shock your pool there are specific substances for that known as pool shocks. These include;
•Calcium hypochlorite; it is the substance that has been used for a long time. It provides convenience and affordability. The pool has to be left for 8 hours before it can be safely used.
•Lithium hypochlorite dissolves much faster the calcium hypochlorite but costs a bit more. It is suitable for use in cases where the swimming pool already has high calcium content. It can be toxic to aquatic life so care should be taken when disposing of it and the treated water.
•Dichlor; is a more modern solution and serves both for usual chlorine purpose and also as a pool shock agent.
•Non-chlorine shock; it uses potassium peroxymonosulfate and it is a fast and inexpensive way to shock your pool especially if you want to use it immediately. It, however, does not function as an algaecide like the rest since it is not chlorine based. The pool will be safe for swimming in under 20 minutes.
When opening your pool for the season, you should do a double shock which is roughly using two pounds of a chlorine-based shock for every 10,000 gallons of water. You should also have your safety gloves and goggles on.
For chlorine-based pool shocks, you should do it at night to avoid the effect of the sun. They also require you to leave the pool for 8 hours before it is safe to use.
Step 14
Filter the pool; At this moment, all the hard work is done. You can now go ahead and leave the filtration system on for 24 hours to mix the water and clear any debris and algae that could have been left.
Let the swimming pool rest, and as soon as it is crystal clear, you can get in for a dip any moment you want. If you love your DIY projects, getting your pool open for the season is an exciting and rewarding process.
You can always ask your friends and family to help as long as you have enough gear. Aside from the manual vacuuming and setting up the fixtures, most of the work is done by the pump and filtration system and will require breaks in between.

Follow the right process and get the right equipment and you will be proud to have prepared your pool early before summer set in.
